Remote PowerShell to Windows VM with WinRM
Remote PowerShell to Windows VM with WinRM
The Remote Desktop Protocol is great to access remotely a Windows Server machine. It is great for actions requiring visual but for actions which can be taken from a PowerShell prompt within the server, it would be best to directly access to a remote PowerShell session from our local computer. Today we will see how we use the Windows Remote Management included in Windows Server to gain access to a remote PowerShell session and therefore manage our server from our local computer through PowerShell. This post is composed by four parts:
- Open ports on Network Security Group and open ports on VM firewall
- Setup the certificate for HTTPS communication with SSL
- Configure WinRM
- Connect on remote session
1. Open ports on Network Security Group and open ports on VM firewall
For Azure or AWS, on the security group, the port 5986 needs to be open. It is the port used by WinRM for a PowerShell remote connection over HTTPS.

Next RDP to your VM and open the same port from the firewall manually or by using the following PS command New-NetFirewallRule.
New-NetFirewallRule -Displayname "Allow Remote PSSession" -Direction Inbound -LocalPort 5986 -Protocol TCP -Action Allow
This creates an Inbound rule which allow TCP connections on port 5986.
2. Setup the certificate for HTTPS communication with SSL
To communicate via SSL, we need to create a key and install the cert (containing the public key) on our local machine. Creating a key can be done using New-SelfSignedCertificate.
New-SelfSignedCertificate -DnsName (your server here).ap-southeast-1.compute.amazonaws.com -CertStoreLocation Cert:\LocalMachine\My
Here we are creating a self signed certificate for the server itself and placing the certificate in the local machine in the personal certificates.
Then go to the certificate manager console and export the certificate.
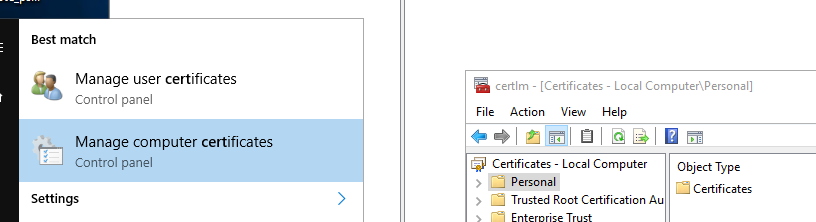
Since we have selected LocalMachine\My the certificate will be under Local Computer\Personal\Certificates. Once you have located your certificate, right click > Export > Select do not export private key > Select DER encoded binary X.509 (.CER) > Save somewhere. The wizard will export the certificate into a .cer file which you can copy to your local computer. Once done double click on the certificate to install it. You can place it inside trusted root to avoid the warning prompt when trying to connect to remote to the VM.
3. Configure WinRM
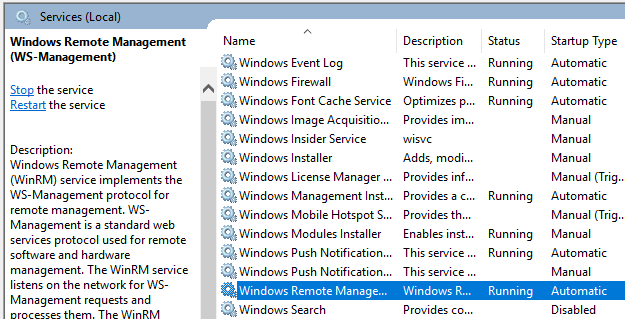
Start by checking that your Windows Server machine has WinRM service running.
Next register a listener for the remote connection by executing the following in PowerShell.
winrm create winrm/config/Listener?Address=*+Transport=HTTPS '@{Hostname="(your server here).ap-southeast-1.compute.amazonaws.com";CertificateThumbprint="(your cert thunmbprint)"}'
winrm enumerate winrm/config/Listener can be used to double check that the listener was properly created.
4. Connect on remote session
Now that we have open the ports on the security group and on the VM firewall, we have create a certificate and shared it to the client machine and finally configured WinRM on the host machine, we are ready to make a remote session.
Execute the following command from your local computer to make a remote connection to your server.
Enter-PSSession -ComputerName (your server here).ap-southeast-1.compute.amazonaws.com -Credential Administrator -UseSSL
Instead of entering the session it is also possible to instantiated the session and use it to copy files for example. Start by saving the session into a variable.
<# Copy file from local to host #>
$pssession = New-PSSession -ComputerName (your server here).ap-southeast-1.compute.amazonaws.com -Credential Administrator -UseSSL
Then copy with the following.
Copy-Item 'C:\Users\Kim Serey\Desktop\abc.PNG' -Destination C:\Users\Administrator\Desktop\ -ToSession $pssession
That concludes how we can remotely manage a Windows Server VM.
Conclusion
Today we saw how we could gain access to our server via remote PowerShell session. We also saw how we could upload files to our server from our local machine. Remote sessions are great as they allow us to trigger scripts on the remote server from our local machine without the need to RDP. It can be leveraged to deploy applications, restart applications, download log files or simply to manage the server configuration itself via PowerShell commands. Hope you liked this post, see you next time!
Comments
Post a Comment